

A month or so ago I took a class on making glass shells at Flame Tree Glass in Roswell. I learned far more than just shells, though! Blowing bubbles had been something that I had tried, but had put aside.
I didn't want to blow out the glass and make dangerous-to-breathe glass "confetti", or otherwise damage my studio or me.
For those who don't work with hot glass, a shard is a thin piece of broken glass that can be used as a decorative element in a lampwork bead. Bubbles are the basis for glass ornaments, glass sculptures such as shells, and other such things.
Several Etsians sell shards, such as AvenueBeads.The top photo is one of Avenue's shard pictures.
What I learned:
The first thing that I learned was that the way you wind glass on your blowpipe--which can be an inexpensive piece of stainless steel tubing or a highly engineered Italian blowpipe--influences the size of your bubble. Apparently glass has grain, like fabric or paper, and winding your glass so that the grain parallels the pipe will result in a larger, more even bubble. Coiling your glass on the end of the pipe actually means you will get a smaller bubble, because it sets the grain in the wrong direction. So just work that glass onto the end of the pipe as you would create a large blob of glass for a focal bead!
The second thing I learned was not to get glass up the blowpipe. It gets hot in your hand, and all the glass is wasted. (This is an especially good point if you are using your instructor's expensive Italian blowpipe.) An ancillary point here is, when you plunge your blowpipe into a vat of water to break off the impacted glass and begin again, put your thumb over the (cool) tip of the pipe to keep steam and boiling water from spewing through the pipe and onto your arm. Closing the cool end pressurizes the pipe and keeps the steam from rising through it.
The third thing I learned was to roll my glass moil (the blob of glass on the end of the pipe) on a marver (a flat surface). This smooths out the surface of the moil, but it also evens the glass and helps you avoid hot spots and thin spots later.
The fourth thing I learned was to work far out in a soft, bushy flame. There is too much turbulence close to the torch face to make a good bubble. A bushy flame also means that it is a reducing flame -- i.e. more propane than oxygen. That will inevitably affect your colours, and you will have to experiment.
Fifthly, I learned that it takes short puffs, without a lot of pressure, about the same as when one is playing recorder. If you don't play recorder (why not???) then short puffs are what's needed. I have to return the moil to the flame several times -- the first few puffs give me the temper of that particular glass; the second puffs even out the moil, and the third heating and set of puffs actually begins to make the glass move.
Along those lines, the sixth thing I learned was to wait a heartbeat before puffing; that allows the moil time to equalize heat. When the glass begins to move, blow smoothly and steadily until the bubble is the size you want. At that point you can blow out a side to start shaping a seashell,or you can lay the bubble aside until it breaks from thermal shock or you whap it gently with your marver to produce shards.
The final things that I learned are: Every glass is different. Begin with a sloppy, loose white, and then move to a nice stiff black. After that, try every color to see how it behaves. I also learned that glassblowing students have come up with every tired joke about "sucking" and "blowing" that there is, with a few to spare. Mostly, however, I learned that I had been afraid for no reason--blowing glass is fun!
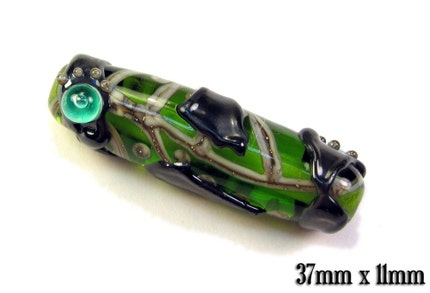
The second picture is of a bead made with shards by my friend Flamekeeper.(Originally posted by me on Qassia.com, 2.17.2008)


No comments:
Post a Comment