I am moving this blog over to WordPress! Come visit me there and add me to your follow list!
http://fourtailslampwork.wordpress.com
Slow Cooker Troubleshooting
1 year ago

 what tutorials I was using. I mentioned them, and he sent me his own tutorial on HP 3-1, which gave the absolutely clearest description that I have yet seen of the dimensionality of that weave. The tutorial helped me figure out the 3-1 weave, as you can see. These are rings that I cut, and are not up to the standard of Curt's. I wanted to try the weave with the size rings Curt recommended, and I was too impatient to order some of his excellent rings. I don't mind cutting a few rings with a jewellery saw to see if I like the weave enough to do it again, but anything more than a bracelet's worth of rings in soft copper and I go running to the store! Life is too short.
 Next I think I could alternate them.
  I am buying the rings for that weave; never again am I cutting 1/8" rings with my hand saw. I have a teeny blade that gives me a nice flush cut, but oy, the labor in keeping an even cut on a weeny surface! Curt earns every penny he charges on those rings, and I am happy to pay it!
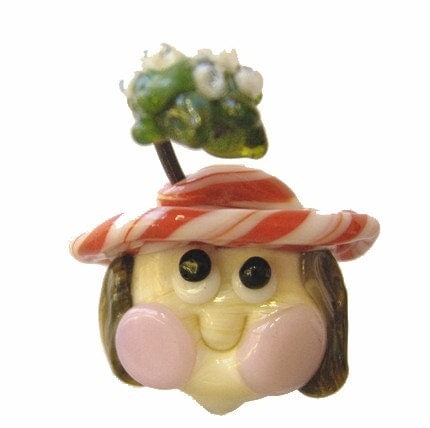 One of the things I really, really like about my local ISGB chapter, "Southern Flames," is that everyone there is so helpful. We're all interested in each other's success, and everyone is just genuinely supportive. One great example is Marcy Lamberson, aka Studio Marcy, Marcy makes the most wonderful, humorous, just plain funny beads out there. She has a fantastic sense of humor when it comes to beads -- check out Kayla the Panda Hula Dancer, or the woman who wants to be kissed under the mistletoe!
 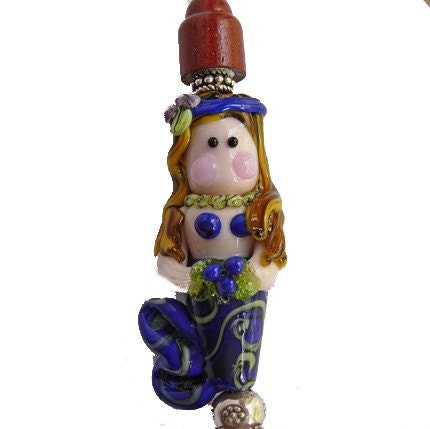 We were both buying glass from another Southern Flames member who had extra in his car, and there in the dark, weighing out glass, we were cracking all kinds of mafia jokes :)
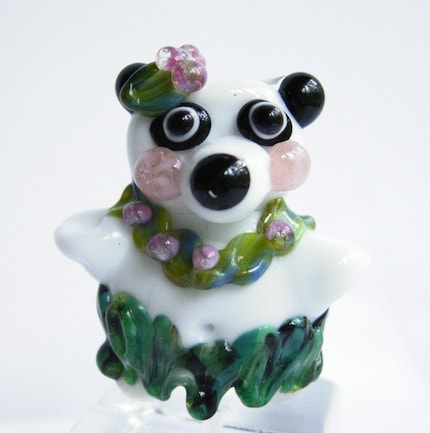


 The people were wonderful, as always; it is lots of fun to chat with returning customers, new ones, and of course other vendors. I'm always so thankful for the people who stop by and look, and talk, whether they buy or not! This year our friend Tara Roberts had made a pile of fleece hats with animal ears--everything from pert cats to long dangly rabbit and sheep ears--and several of us bought them. Julia and I each had one, and they were a conversation piece (AND were warm!). If you are on Facebook, Tara's husband John posted pictures of the show, including a picture of Tara in her bunny hat and other lampworkers in theirs.
 I started with a simple box chain, but I tarted it up with square wire. As a box chain is rather rectangular and, well, boxy, I thought I would see what happened when I used square wire. Lo and behold, it was elegant! I need to dig it out of the show box and take a picture of it.
 I added bright blue lampwork beads, with copper bead caps, and really liked the result.
 All in all, it was tiring--but a good time was had by all.


