For the most part, my photography routine works well. Crop to size. Adjust color to as close to the bead as I can using levels. Resize to 1000 px square, and run unsharp mask. But sometimes that routine just doesn't work. Since I have been procrastinating doing some work for my day job, I have been searching out GIMP tutorials to share. One of the simplest is a lovely video tutorial on creating a graduated ND filter, which enriches the colors of your photo when they are washed out.
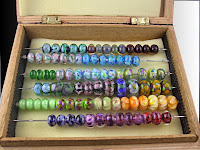
Here is my original picture. Not bad, but not great, either.
 Well, let me say that this isn't really the original--I've already cropped the picture to zoom in close. Otherwise, though, I haven't done anything to the image.
Next, I went ahead and changed the colors using the Color --> Levels command. This command lets you adjust the color levels using a histogram, and lets you fiddle with the colors until they more closely approximate the colors in your original beads.
 I used to use the automatic white balance eyedropper, but now I just use the slider bars in the histogram (it opens up when you click Colors -->Levels) until the colors look natural.
Only some times they don't. I've found there's lots of ways to make the colors pop, but one of the simplest is to add an ND-Filter. The tutorial creator does a good job of explaining how to do this, so I will just add my results here. However, if you have trouble following the video, let me know and I can walk you through it.
The final result:

Try it and see if it helps your photos!
s


